Cidre Bouche Brut Organic, Etienne Dupont and Le Chatelain Camembert. Photos taken from the Astor Wines and Murray's Cheese
This past August my friends and I took a class at Murray's Cheese called Power Trio: Beer, Cider, and Cheese. I am finally getting around to posting about it (after shuffling through a stack of papers I remembered I took this class), and I thought there really isn't a better time to have cider than now that it is finally feeling like fall around here. So I am just going to highlight my three favorite pairings. You can get the ciders at Astor Wines and the cheese at Murray's Cheese, but I am sure there are other places you can find both.
Showing posts with label cheese. Show all posts
Tuesday, October 18, 2011
Wednesday, July 27, 2011
Vermont Cheesemakers' Festival
Last weekend, I got on a bus with thirty-some other people and traveled from Murray's Cheese in NYC, all the way to Shelburne, Vermont, for the Vermont Cheesemakers' Festival. I had such an amazing weekend getting to know the fun and funny people from Murray's Cheese, as well as eating cheese (duh), and experiencing gorgeous Vermont for the first time. It was the perfect weekend escape from the sweltering NYC life (it was 80 glorious degrees in Vermont on Sunday).
Tuesday, July 26, 2011
The Best Thing I Had In My Mouth - Bluebird Tavern
![]() |
| Photo from Bluebird Tavern. Click here for link. |
Tuesday, April 26, 2011
Murray's Cheese Class - Honey & Cheese Pairing
After long and relaxing week in Mexico, it is back to reality. After an overload of beer, margaritas, and beans and rice, starting today I am doing a 3-day BluePrint Cleanse (for real this time). But before I start that (drinking hot water with lemon as I type), I am trying to forget about all the delicious food I have eaten these past couple weeks. Two weeks ago, my friends and I went to Murray's Cheese for a honey and cheese pairing class. Taught by Louise Geller and Let It Bee Honey bee keeper, Christine Lehner, the class went through some amazing cheese and honey combinations.
Thursday, January 20, 2011
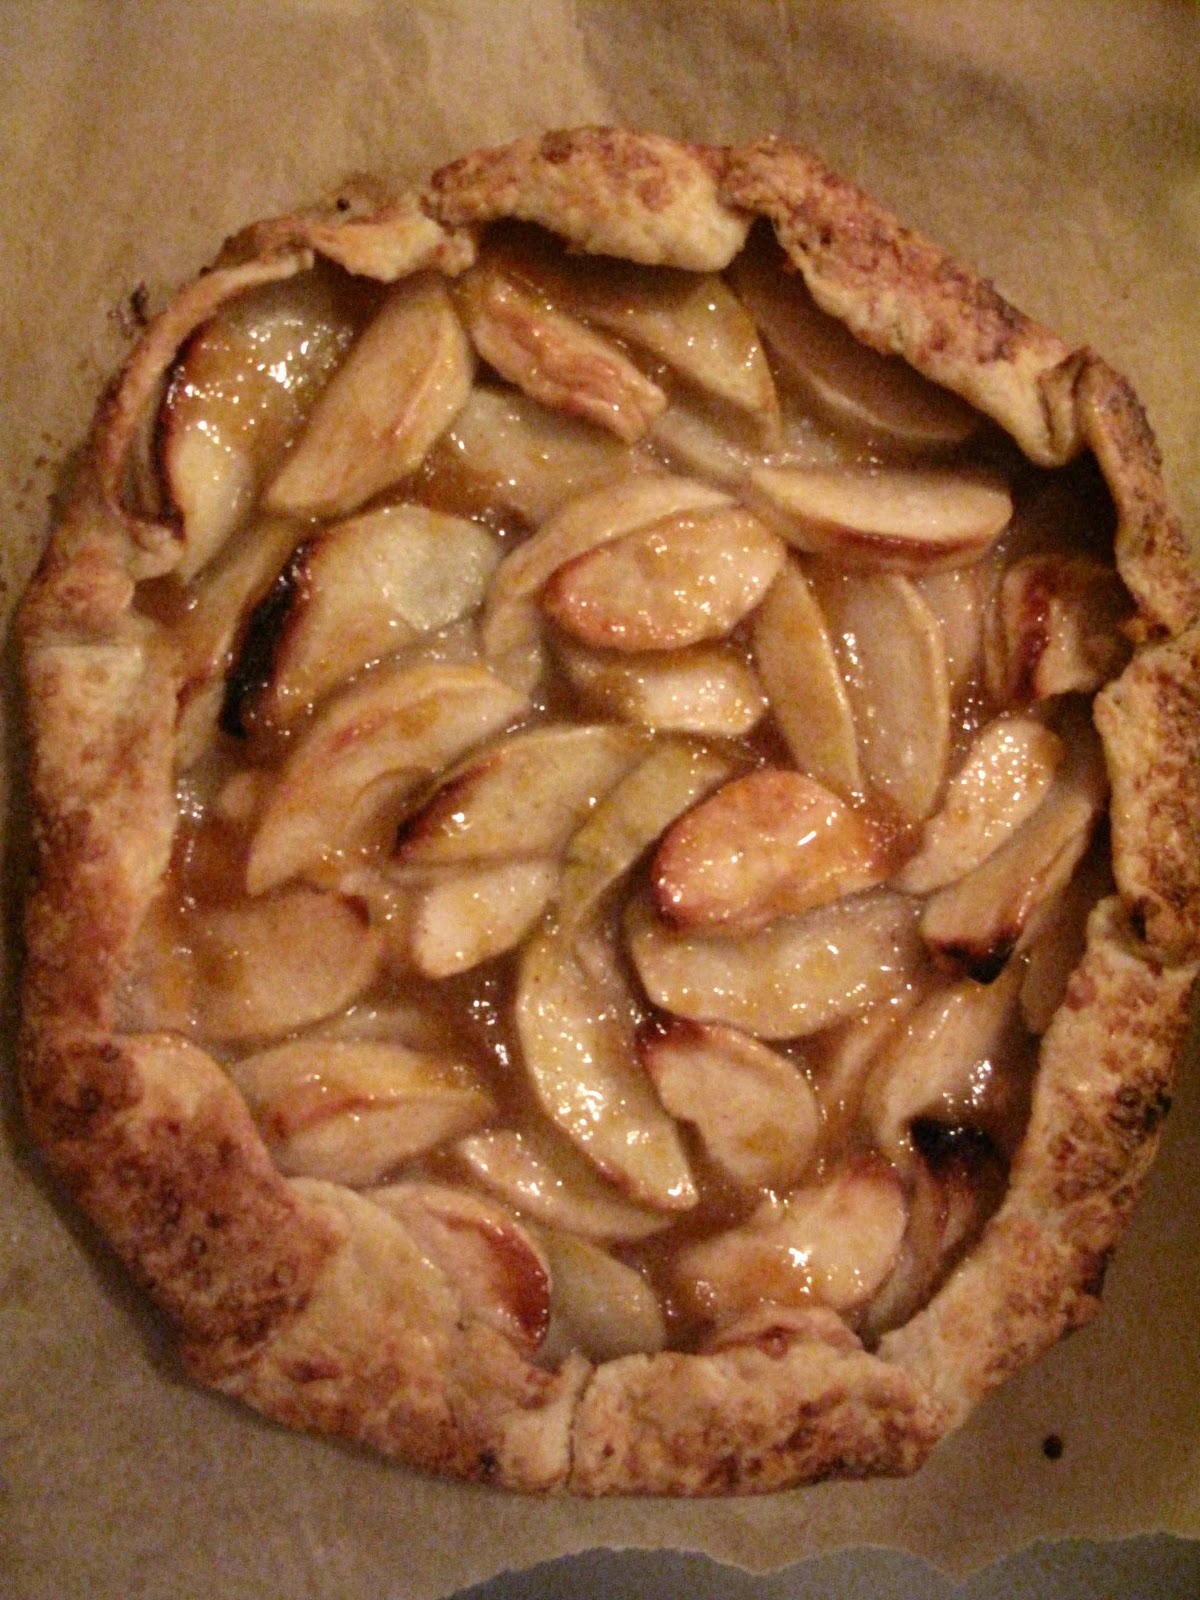
Apple Cheddar Crostata
I made this Apple Cheddar Crostata for Thanksgiving, and just now got around to sharing. What I love about it, besides the word "crostata," is how simple and rustic it is. This is from Martha Stewart Living
's Novemeber 2010 issue (of course - what's Thanksgiving without Martha?) I will admit that I was a bit nervous switching up my classic apple pie for this new dessert with the risky cheddar crust. In the end I was happy about the change. The cheddar flavor was definitely there, but not overbearing. I would give it a try while you are waiting for all the delicious spring fruit to come.
Ingredients for the Apple Cheddar Crostata from Martha Stewart Living
, makes one 11-inch crostata:
-1 disk Cheddar Pie Dough (recipe below)
-1 large egg, lightly beaten for egg wash
-Coarse sanding sugar, for sprinkling
-2 tart apples, such as Granny Smith or Gala, peeled, cored, and cut into 1/2 wedges
-2 Macintosh apples, peeled, cored, and cut into 1/2 wedges
-1/2 cup granulated sugar
-2 tablespoons all-purpose flour
-2 tablespoons fresh lemon juice
-1/4 teaspoon ground cinnamon
-1/4 cup apricot preserves, warmed
Cheddar Pie Dough, makes one disk of dough
-1 1/4 cups all-purpose flour
-1/2 teaspoon salt
-1 stick cold unsalted butter, cut into small pieces
-A couple tablespoons cup ice water
-1/2 cup shredded sharp white cheddar cheese
Begin by making the cheddar pie dough. I like to do this the night before. In a food processor, pulse flour and salt until combined. Add butter, and pulse until mixture resembles coarse meal, about 10 seconds. Drizzle a bit of water in at a time (about 1 tablespoon), and pulse until the mixture just begins to hold together (dough should not be wet or sticky). Add cheese and pulse until combined. Shape dough into disk, and wrap in plastic wrap. Refrigerate until chilled, about 30 minutes, up to overnight. Click here for more tips on perfect pie dough.
Once you dough is chilled, roll out the dough to a 13-inch circle, about 1/8-inch thick, on a lightly floured surface. Transfer to a parchment-lined baking sheet. I gently roll the dough over my rolling pin to transfer to baking sheet. Refrigerate for 20 minutes.
Meanwhile, make the filling. Toss together the apples, sugar, flour, lemon juice, and cinnamon.
Preheat oven to 375 degrees F. Spread the filling over the dough, leaving a 1 1/2-inch border. Fold edges in to form crust. Brush with egg wash, and sprinkle with sanding sugar. Refrigerate until edges are firm, about 30 minutes.
Bake crostata until apples are tender and crust is golden. Martha suggests 1 hour 20 minutes, but mine was ready in an hour, so watch your time. Let cool slightly, and then brush apples with apricot preserves. Serve warm or at room temperature, both are good :)
Click here to see the Roasted Vegetable Lasagna my friend Josh made last year.
Ingredients for the Apple Cheddar Crostata from Martha Stewart Living
-1 disk Cheddar Pie Dough (recipe below)
-1 large egg, lightly beaten for egg wash
-Coarse sanding sugar, for sprinkling
-2 tart apples, such as Granny Smith or Gala, peeled, cored, and cut into 1/2 wedges
-2 Macintosh apples, peeled, cored, and cut into 1/2 wedges
-1/2 cup granulated sugar
-2 tablespoons all-purpose flour
-2 tablespoons fresh lemon juice
-1/4 teaspoon ground cinnamon
-1/4 cup apricot preserves, warmed
Cheddar Pie Dough, makes one disk of dough
-1 1/4 cups all-purpose flour
-1/2 teaspoon salt
-1 stick cold unsalted butter, cut into small pieces
-A couple tablespoons cup ice water
-1/2 cup shredded sharp white cheddar cheese
Begin by making the cheddar pie dough. I like to do this the night before. In a food processor, pulse flour and salt until combined. Add butter, and pulse until mixture resembles coarse meal, about 10 seconds. Drizzle a bit of water in at a time (about 1 tablespoon), and pulse until the mixture just begins to hold together (dough should not be wet or sticky). Add cheese and pulse until combined. Shape dough into disk, and wrap in plastic wrap. Refrigerate until chilled, about 30 minutes, up to overnight. Click here for more tips on perfect pie dough.
Once you dough is chilled, roll out the dough to a 13-inch circle, about 1/8-inch thick, on a lightly floured surface. Transfer to a parchment-lined baking sheet. I gently roll the dough over my rolling pin to transfer to baking sheet. Refrigerate for 20 minutes.
Meanwhile, make the filling. Toss together the apples, sugar, flour, lemon juice, and cinnamon.
Preheat oven to 375 degrees F. Spread the filling over the dough, leaving a 1 1/2-inch border. Fold edges in to form crust. Brush with egg wash, and sprinkle with sanding sugar. Refrigerate until edges are firm, about 30 minutes.
Bake crostata until apples are tender and crust is golden. Martha suggests 1 hour 20 minutes, but mine was ready in an hour, so watch your time. Let cool slightly, and then brush apples with apricot preserves. Serve warm or at room temperature, both are good :)
Click here to see the Roasted Vegetable Lasagna my friend Josh made last year.
Sunday, December 5, 2010
Murray's Cheese Gifts!
My buzzer rang yesterday, and I assumed it was my monthly exterminator, but to my surprise it was actually a special delivery. I thought, who is sending me an early Christmas gift? Well is was from the adorable Sascha from Murray's Cheese! I guess I was such a good cheese course customer that I deserved La Tur cheese and some Pralus Chocolate Pyramide. Thank you Murray's Cheese!
Speaking of Murray's Cheese, a gift from Murray's Cheese would a great for gift for any foodie. Click here for their list of delicious options.
Wednesday, September 8, 2010
Murray's Cheese
Have you been to Murray's Cheese? Do you live in New York City? If you answered "no" to the first question, and "yes" to the second question, then please stop reading this post and immediately go to Bleeker Street. As a former cheese-hater, I give 95 percent of the credit to Murray's Cheeses for changing my cheese-hating ways. Growing up, I would not eat anything with cheese on it. I would rip the cheese off pizza until I was in college, where it was socially unacceptable to do so. I would send back salads that had a sprinkle of cheese. The smell of my mom's cheese dip, still makes me gag as I pass by the crock pot, but Velveeta isn't cheese right?So please prepare for a lengthy post, confessing my love and alliance to Murray's Cheese. At the end of it, there will be a recipe, I promise.
I have only been to the original Murray's Cheese Shop on Bleeker Street, but there is also a shop in Grand Central Station. The store has a large cheese counter of course, and also has a charcuterie section, as well as special products such as honey, pickles, and gourmet ice cream. Behind the counter you will find friendly cheesemongers ready to help you and answer any questions you have. But the best spot in the whole store is the class room just in the back and up some steps.
![]() |
| Fritz on left and Garrett on right. |
Oh, and besides the food you are learning about, there are fresh baguettes, dried cherries and apricots, walnuts, and my favorite - Marcona almonds. Along with your delicious plate of food is a packet that has information on everything you are trying for the night, as well as a space for you to take notes. Another staple for each class, is the education and events coordinator, Sascha Ingram. Sascha has a genuine and upbeat personality, which helps loosen everyone up at the start of the class, as she introduces the instructor and tells us what is to be expected for the night. She also teaches a few classes here and there too. I highly recommend saving a bit of your dough (classes range from $50-$75 usually), and signing up for a class. It is well worth the money, and it a fun way to learn more about cheese, etc. from someone who really knows. Every instructor I have had is passionate about the products, and want you to like them as much as they do. Click here to view their class list for the fall, and sign for one - their classes fill up pretty quickly, especially the classic Cheese 101 class.
So my recent class was taught by the dreamy Bob McClure, of McClure's Pickles. Bob is young guy (actor, writer, and pickler), living the dream with help from his brother (who is co-owner of McClure's Pickles), and support from the rest of his family. Bob has been making pickles with his grandfather since he was six years old, and his has been using his great grandmother Lala's recipe for his pickles. That night we snacked on pickles (love the McClure's Spicy Pickles), cheese, and a jam and mustard, and then got our hands dirty and made some classic garlic dill pickles. This week I opened my jar, and I was thrilled to have the crunchiest pickle I have had in my life. Besides the crunch, which is of high importance to me, the flavor was great too. Bob emphasized the importance of getting the freshest ingredients you can, encouraging us to go to the farmers market, get some kirbys, and throw them on some ice (do not freeze), until ready to use - which should be as soon as possible.
Here are the ingredients for Bob McClure's Garlic and Dill Pickles:
-6 pounds small pickling cucumbers
-12 cloves of garlic, peeled and halved (Bob recommended Christopher Ranch peeled garlic, if you are making a lot of pickles)
-1-2 bunches of dill
-3 cups water
-3 cups of distilled white vinegar (vinegar should have 4-5 percent acidity so it can keep the bacteria out of the jar)
-1/4 cup pickling salt (Kosher salt can be substituted)
Directions
1. Wash cucumbers, and place in a large deep bowl with ice. Cover and put in fridge. Let cucumbers soak in ice while you prep other materials.
2. Wash dill thoroughly and trim off roots (if any remain).
3. Place peeled garlic in a small bowl and pour hot vinegar over garlic. Let stand for 1 minute then pour vinegar out. The hot vinegar inactivates an enzyme that turns the garlic blue when you pickle it.
4. Fill a large pot with water. Place a har in the pot and make sure the water is at least 1 inch above the top of the jar. Remove the test jar ad bring water to boil.
5. In another large pot, combine the vinegar, water, and pickling salt. Bring the brine to a rapid boil. Stir the salt to make sure it doesn't stick to the bottom of pot.
6. While pots are getting up to a boil, take cucumbers out and quarter them. Then take 1 spear, grab your mason jar and place inside the jar. Make sure cucumber stands 1/4 to 1/2 inch below the rim if the jar. Trim your cucumbers to this size. (Keep the little bits too for later).
7. After water is boiling, submerge mason jars in pot and sterilize for about 90 seconds. Remove jars carefully with jar tongs.
8. In each jar, place 2 halves of garlic, one small handful of dill, then enough cucumbers to fill the jar, making sure cucumbers are below the "neck-line." (If using pint jars, double the amount of dry ingredients in each jar). Be sure to pack the jars tight enough that the jar could be flipped over and nothing would fall out.
9. Place 2-piece lids in boiling water for 90 seconds, then carefully remove and place in a bowl.
10. Fill jars with hot brine, leaving about a 1/4 inch of space.
11. Cap and seal jars. Turn them over to make sure you have an adequate seal. Repeat until all jars are completed.
12. Place jars back in boiling water pot. Process sealed jars in boiling water for 10 minutes.
13. Wait a week to two weeks before eating. Refrigerate after opening. Pickles will keep for up to 1 year if stored in a cool, dry place.
I would definitely make these again if there are any Kirbys left from the season...otherwise I am thinking of using my green beans from my CSA for pickling. I think they could be pretty delicious too.
Here are the ingredients for Bob McClure's Garlic and Dill Pickles:
-6 pounds small pickling cucumbers
-12 cloves of garlic, peeled and halved (Bob recommended Christopher Ranch peeled garlic, if you are making a lot of pickles)
-1-2 bunches of dill
-3 cups water
-3 cups of distilled white vinegar (vinegar should have 4-5 percent acidity so it can keep the bacteria out of the jar)
-1/4 cup pickling salt (Kosher salt can be substituted)
Directions
1. Wash cucumbers, and place in a large deep bowl with ice. Cover and put in fridge. Let cucumbers soak in ice while you prep other materials.
2. Wash dill thoroughly and trim off roots (if any remain).
3. Place peeled garlic in a small bowl and pour hot vinegar over garlic. Let stand for 1 minute then pour vinegar out. The hot vinegar inactivates an enzyme that turns the garlic blue when you pickle it.
4. Fill a large pot with water. Place a har in the pot and make sure the water is at least 1 inch above the top of the jar. Remove the test jar ad bring water to boil.
5. In another large pot, combine the vinegar, water, and pickling salt. Bring the brine to a rapid boil. Stir the salt to make sure it doesn't stick to the bottom of pot.
6. While pots are getting up to a boil, take cucumbers out and quarter them. Then take 1 spear, grab your mason jar and place inside the jar. Make sure cucumber stands 1/4 to 1/2 inch below the rim if the jar. Trim your cucumbers to this size. (Keep the little bits too for later).
7. After water is boiling, submerge mason jars in pot and sterilize for about 90 seconds. Remove jars carefully with jar tongs.
8. In each jar, place 2 halves of garlic, one small handful of dill, then enough cucumbers to fill the jar, making sure cucumbers are below the "neck-line." (If using pint jars, double the amount of dry ingredients in each jar). Be sure to pack the jars tight enough that the jar could be flipped over and nothing would fall out.
9. Place 2-piece lids in boiling water for 90 seconds, then carefully remove and place in a bowl.
10. Fill jars with hot brine, leaving about a 1/4 inch of space.
11. Cap and seal jars. Turn them over to make sure you have an adequate seal. Repeat until all jars are completed.
12. Place jars back in boiling water pot. Process sealed jars in boiling water for 10 minutes.
13. Wait a week to two weeks before eating. Refrigerate after opening. Pickles will keep for up to 1 year if stored in a cool, dry place.
I would definitely make these again if there are any Kirbys left from the season...otherwise I am thinking of using my green beans from my CSA for pickling. I think they could be pretty delicious too.
Subscribe to:
Posts (Atom)